Install Vaquill AI for Word manually
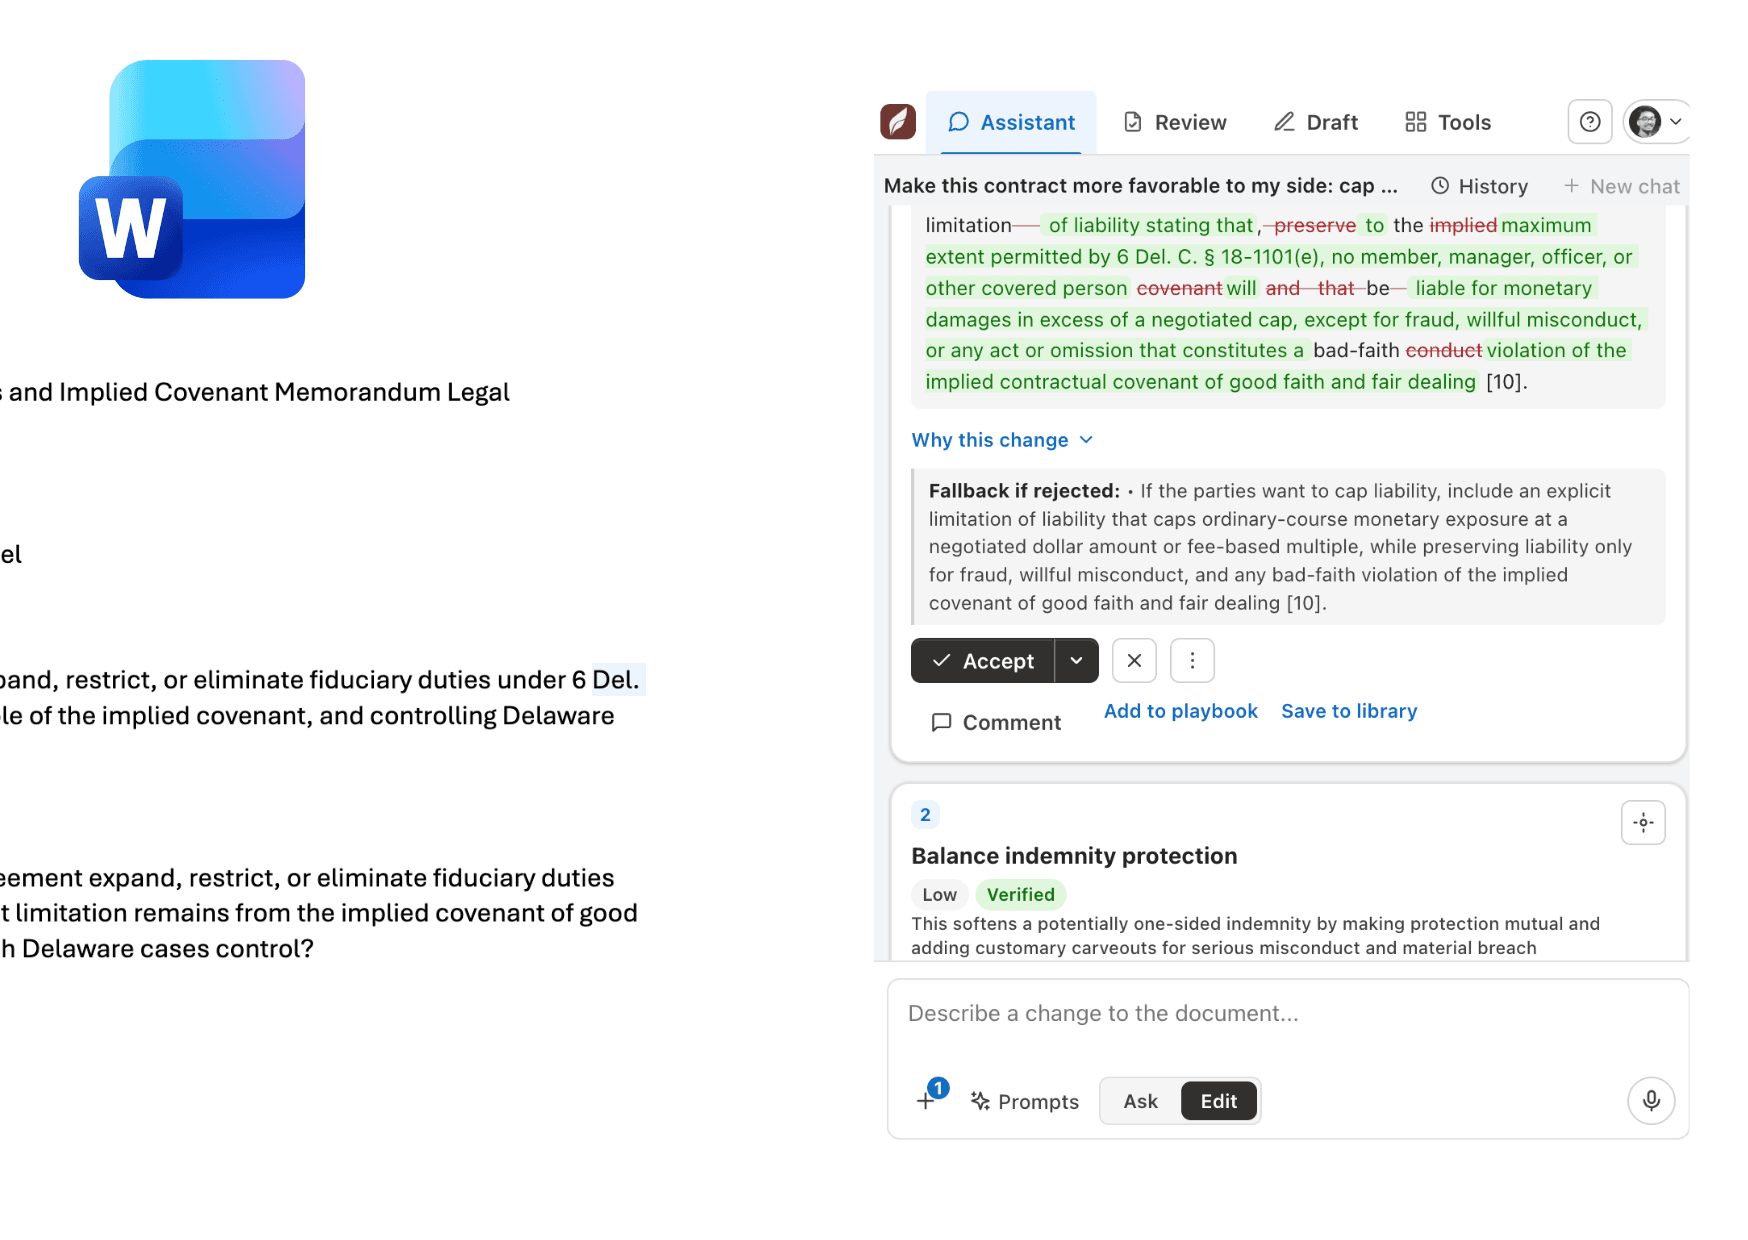
Vaquill AI for Word is not in the Microsoft store yet, so you add it by hand: download one file, then upload it in Word. Seven steps, about three minutes. This guide is for Word on the web and Word for Mac.
Before you start
- A Microsoft 365 account, so you can open a document in Word on the web or Word for Mac.
- The manifest file. That is the one file Word needs. Download it just below and remember where it saves (usually your Downloads folder).
- Either a free Vaquill AI account or your own
 or
or  API key. You choose which at the end.
If the file opens in your browser instead of downloading, right-click the button, choose Save Link As, and keep the name ending in .xml.
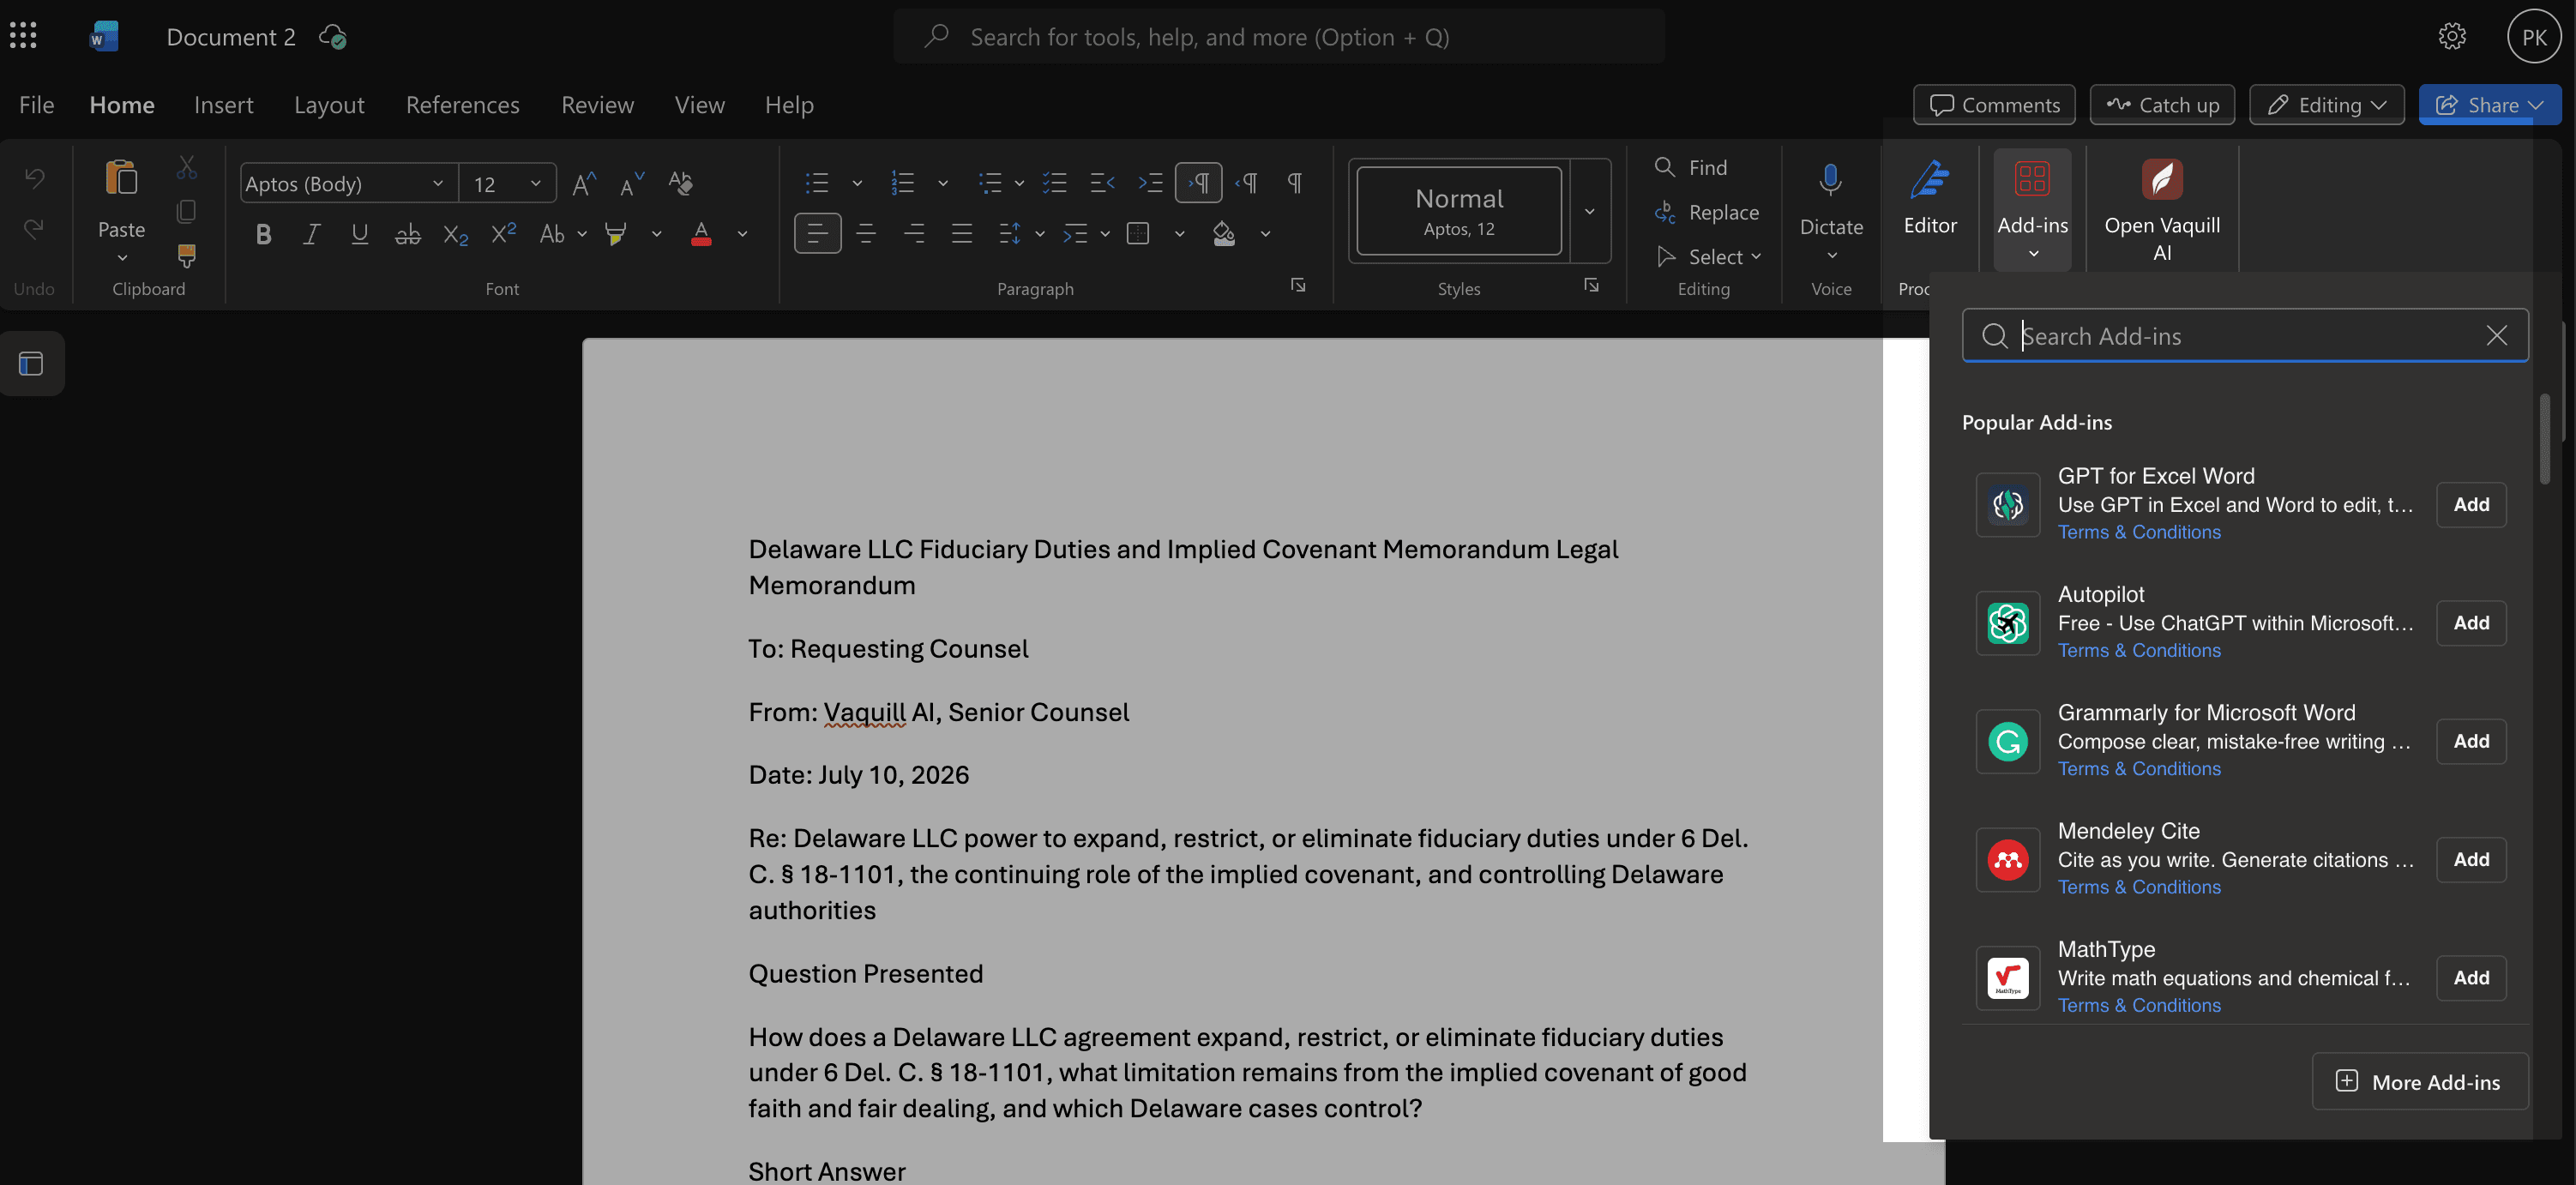
Open a document and find the Add-ins menu
Open any document in Word (a blank one is fine). On the Home tab, click Add-ins. A small panel opens. Scroll to the bottom of it and click More Add-ins.
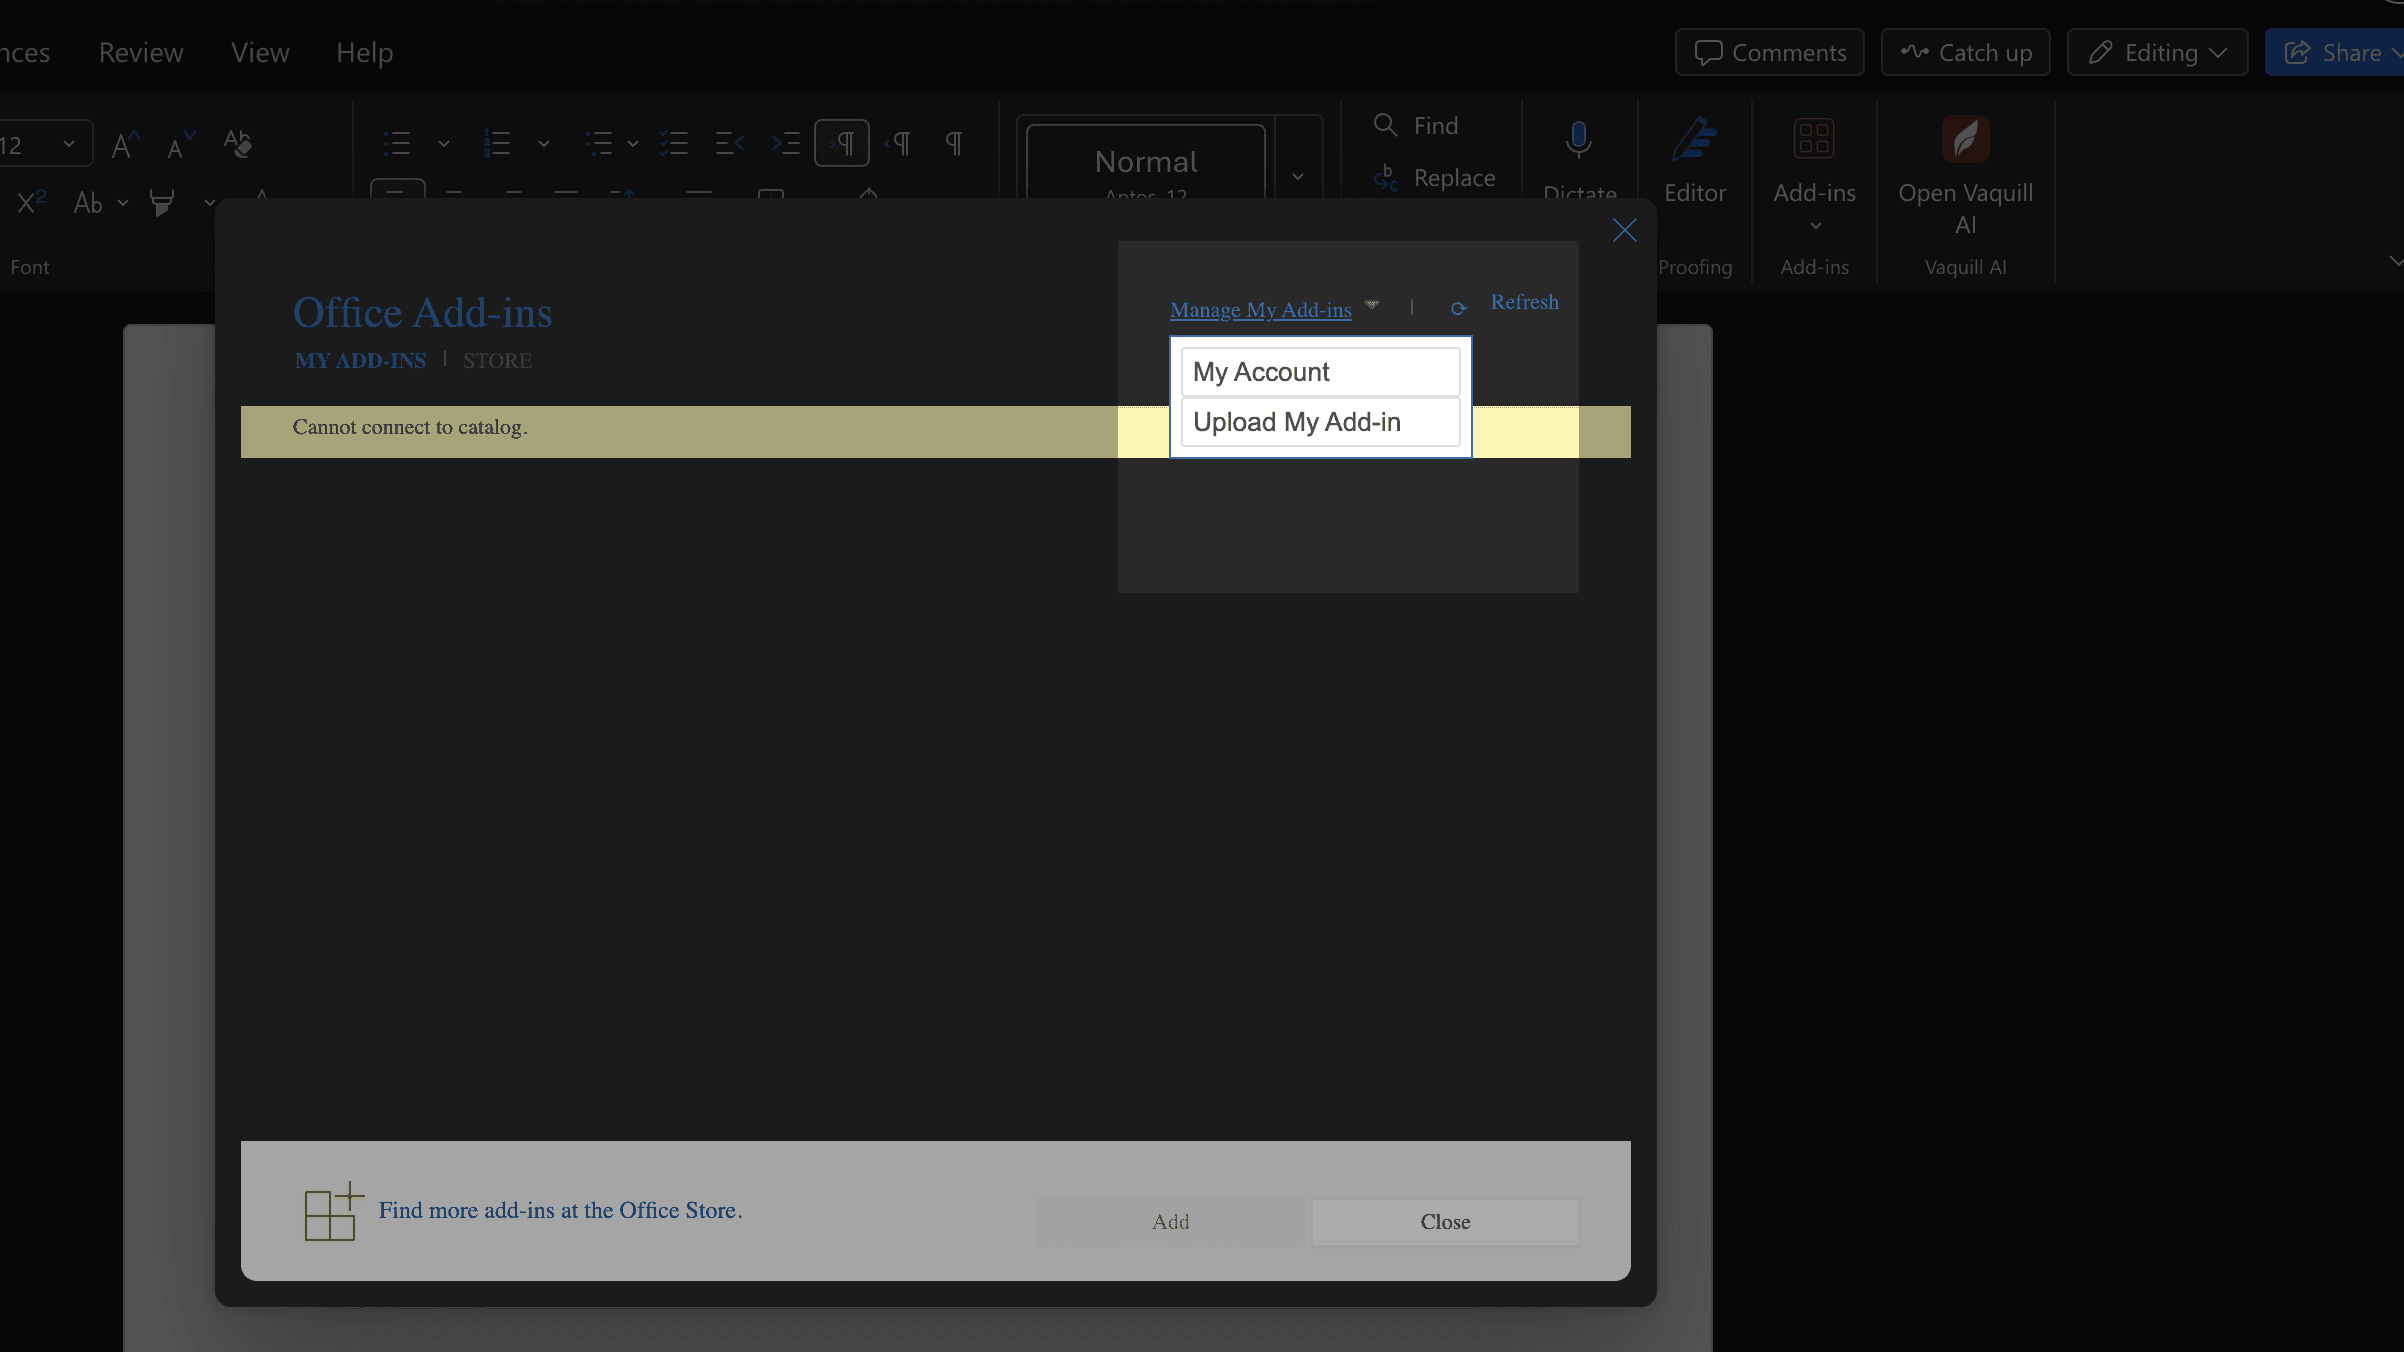
Choose "Upload My Add-in"
The Office Add-ins window opens. In the top-right corner, click Manage My Add-ins, then Upload My Add-in. If you see a yellow “Cannot connect to catalog” note, ignore it. That is expected and does not block the upload.
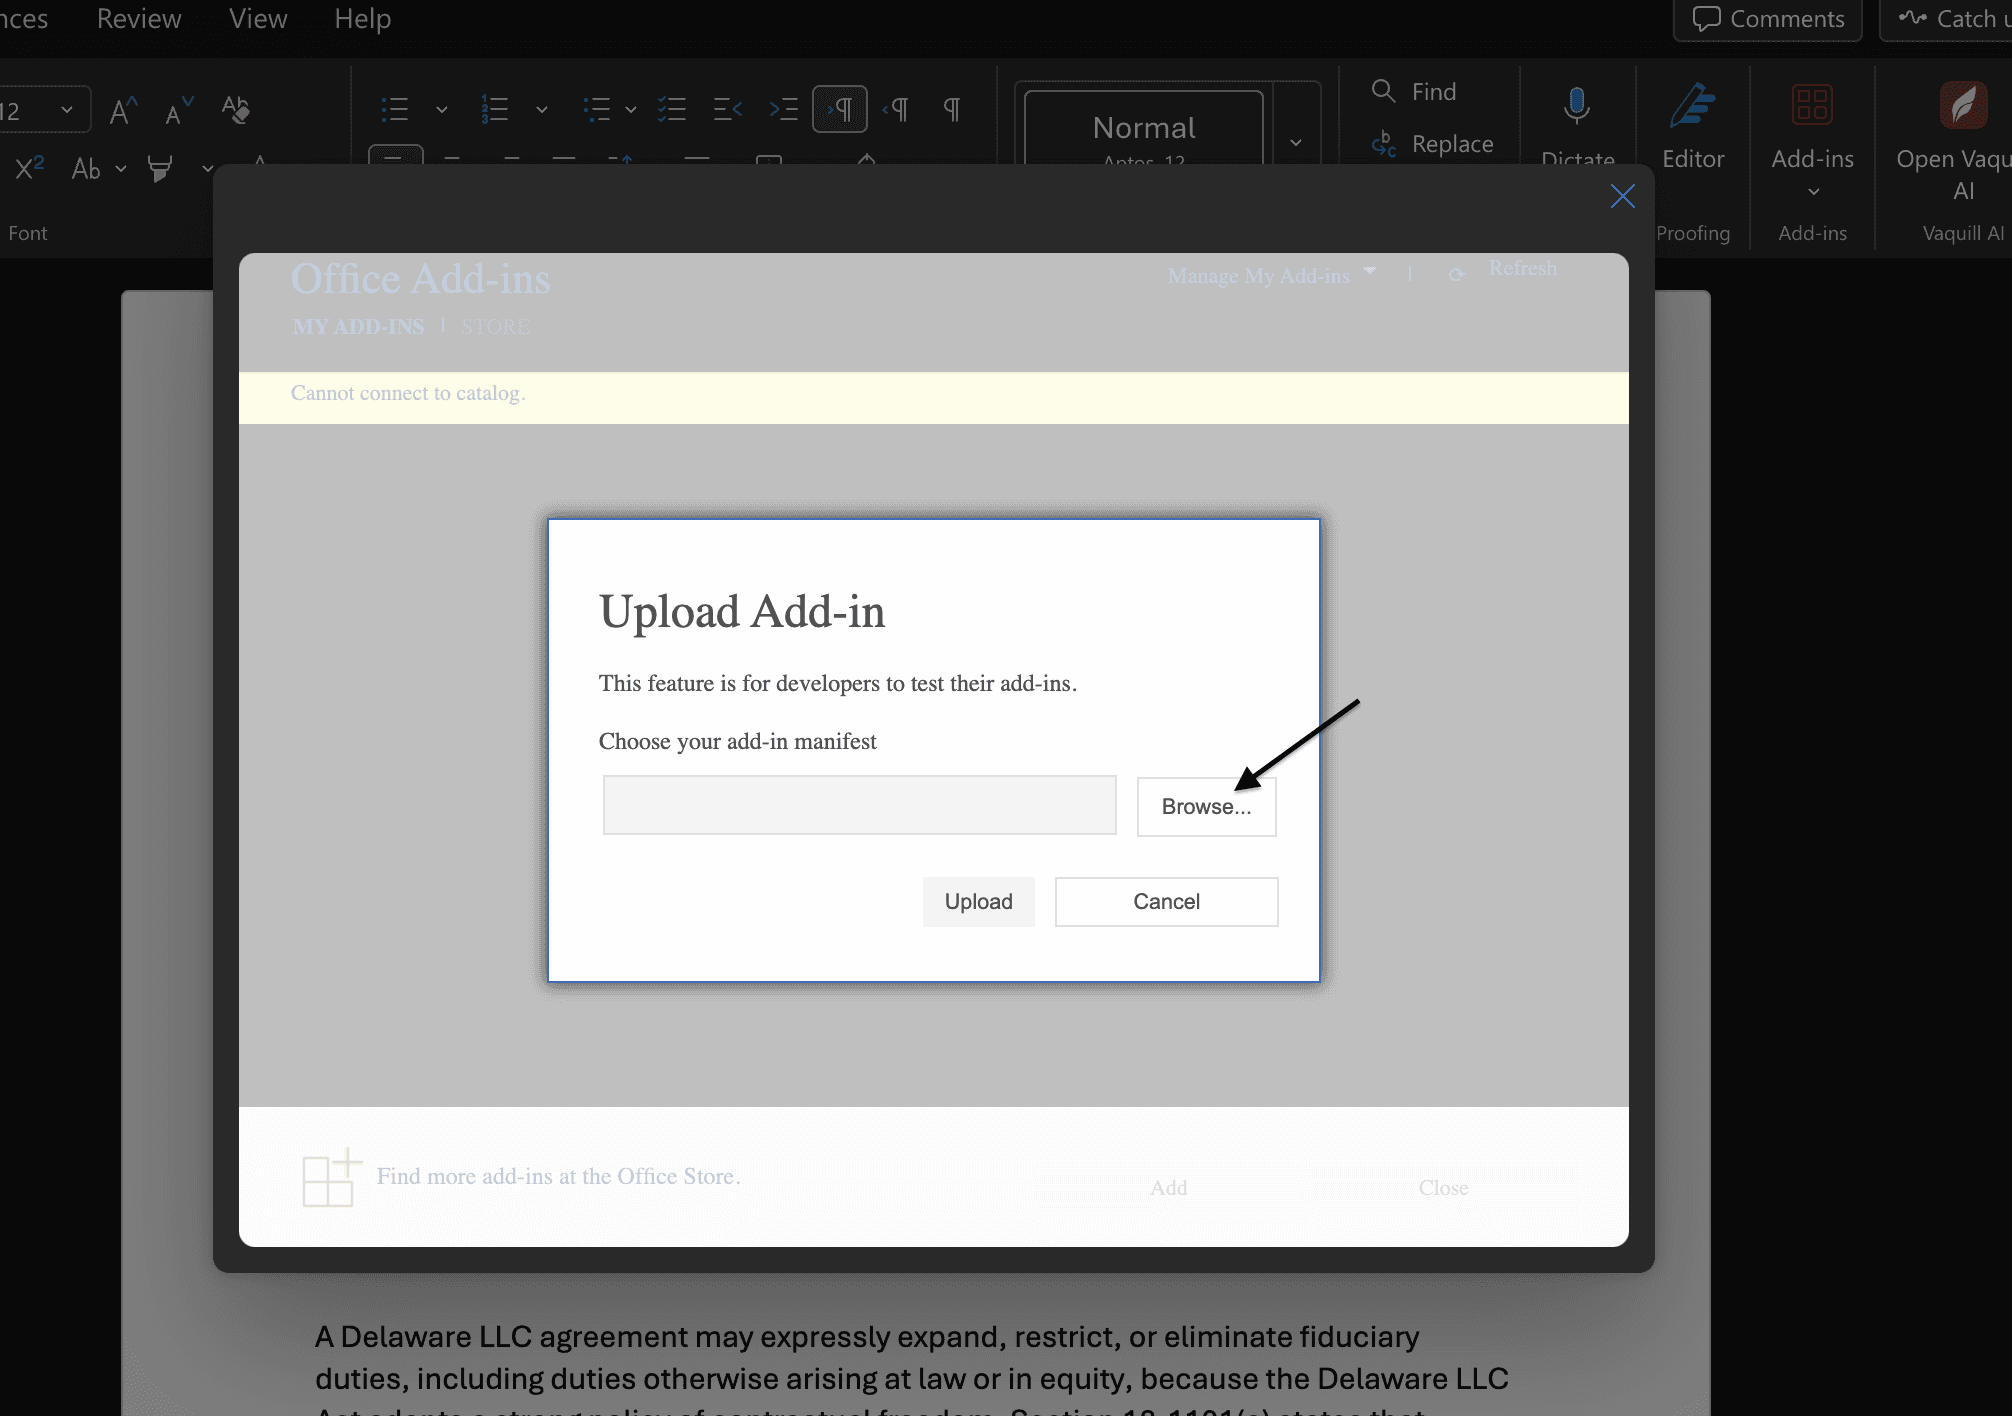
Click Browse
A small Upload Add-in box appears. Click Browse… so you can point Word at the manifest file you downloaded earlier.
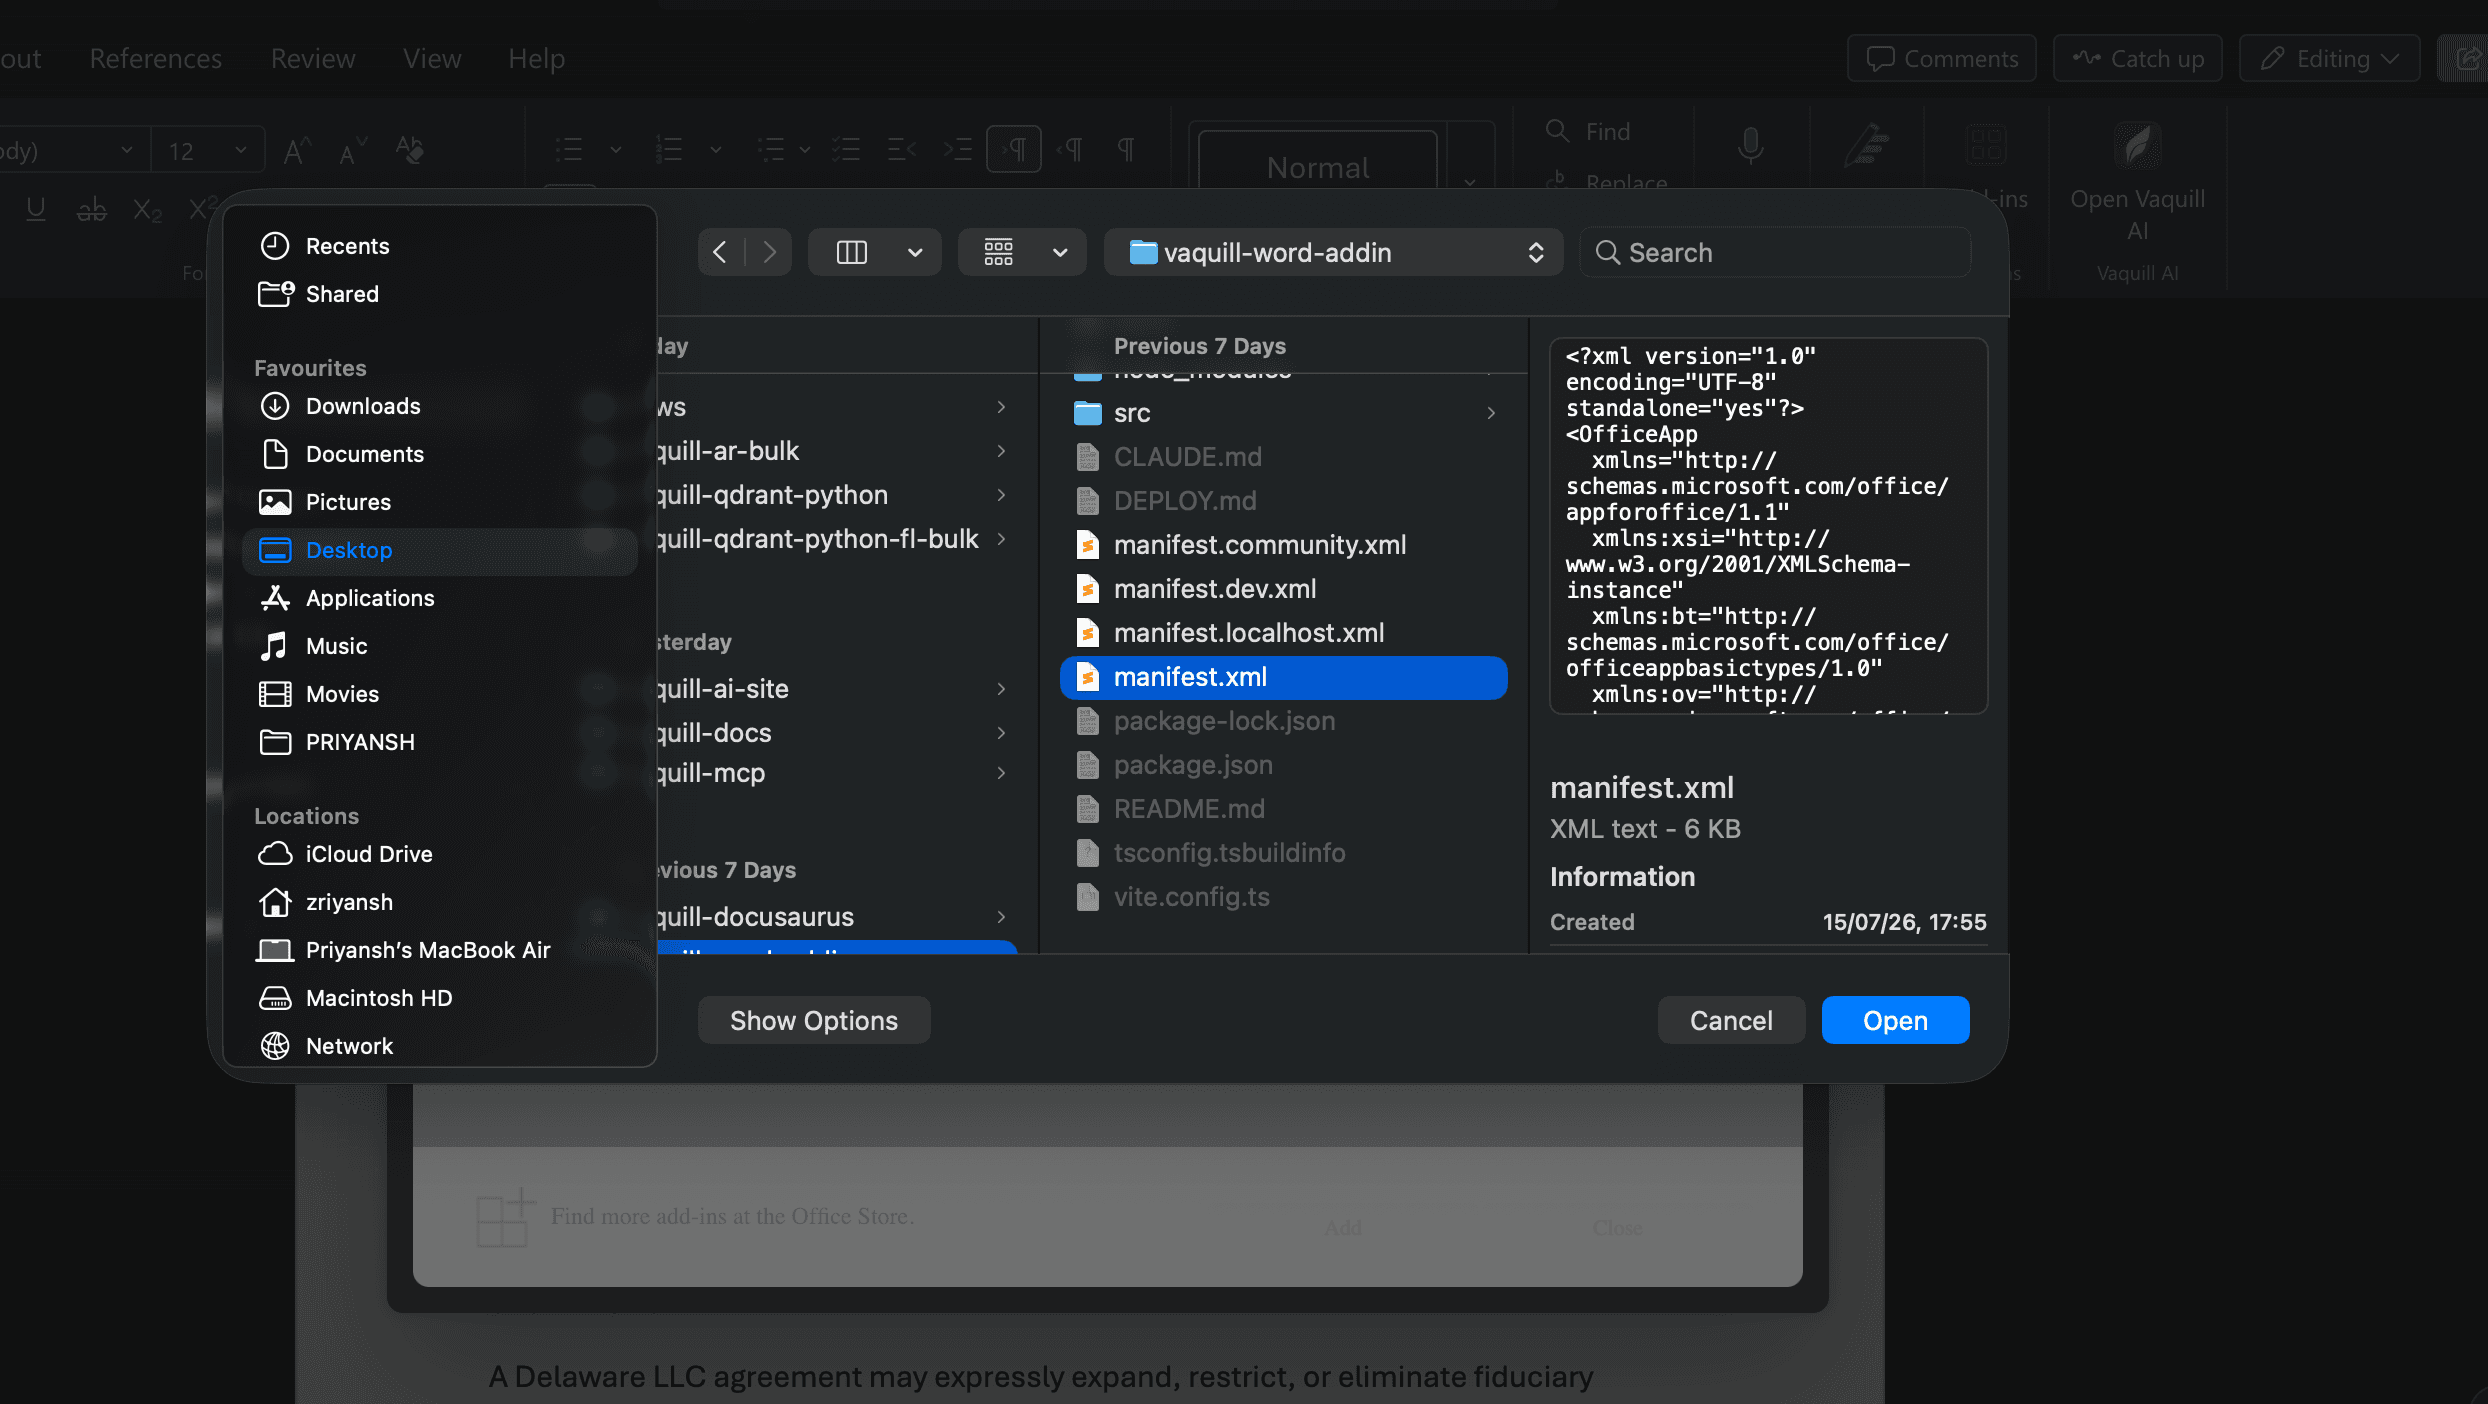
Pick the manifest.xml file
Find the manifest.xml file you saved, select it, and click Open. This one small file is all Word needs. It tells Word where the add-in lives; nothing installs onto your computer.
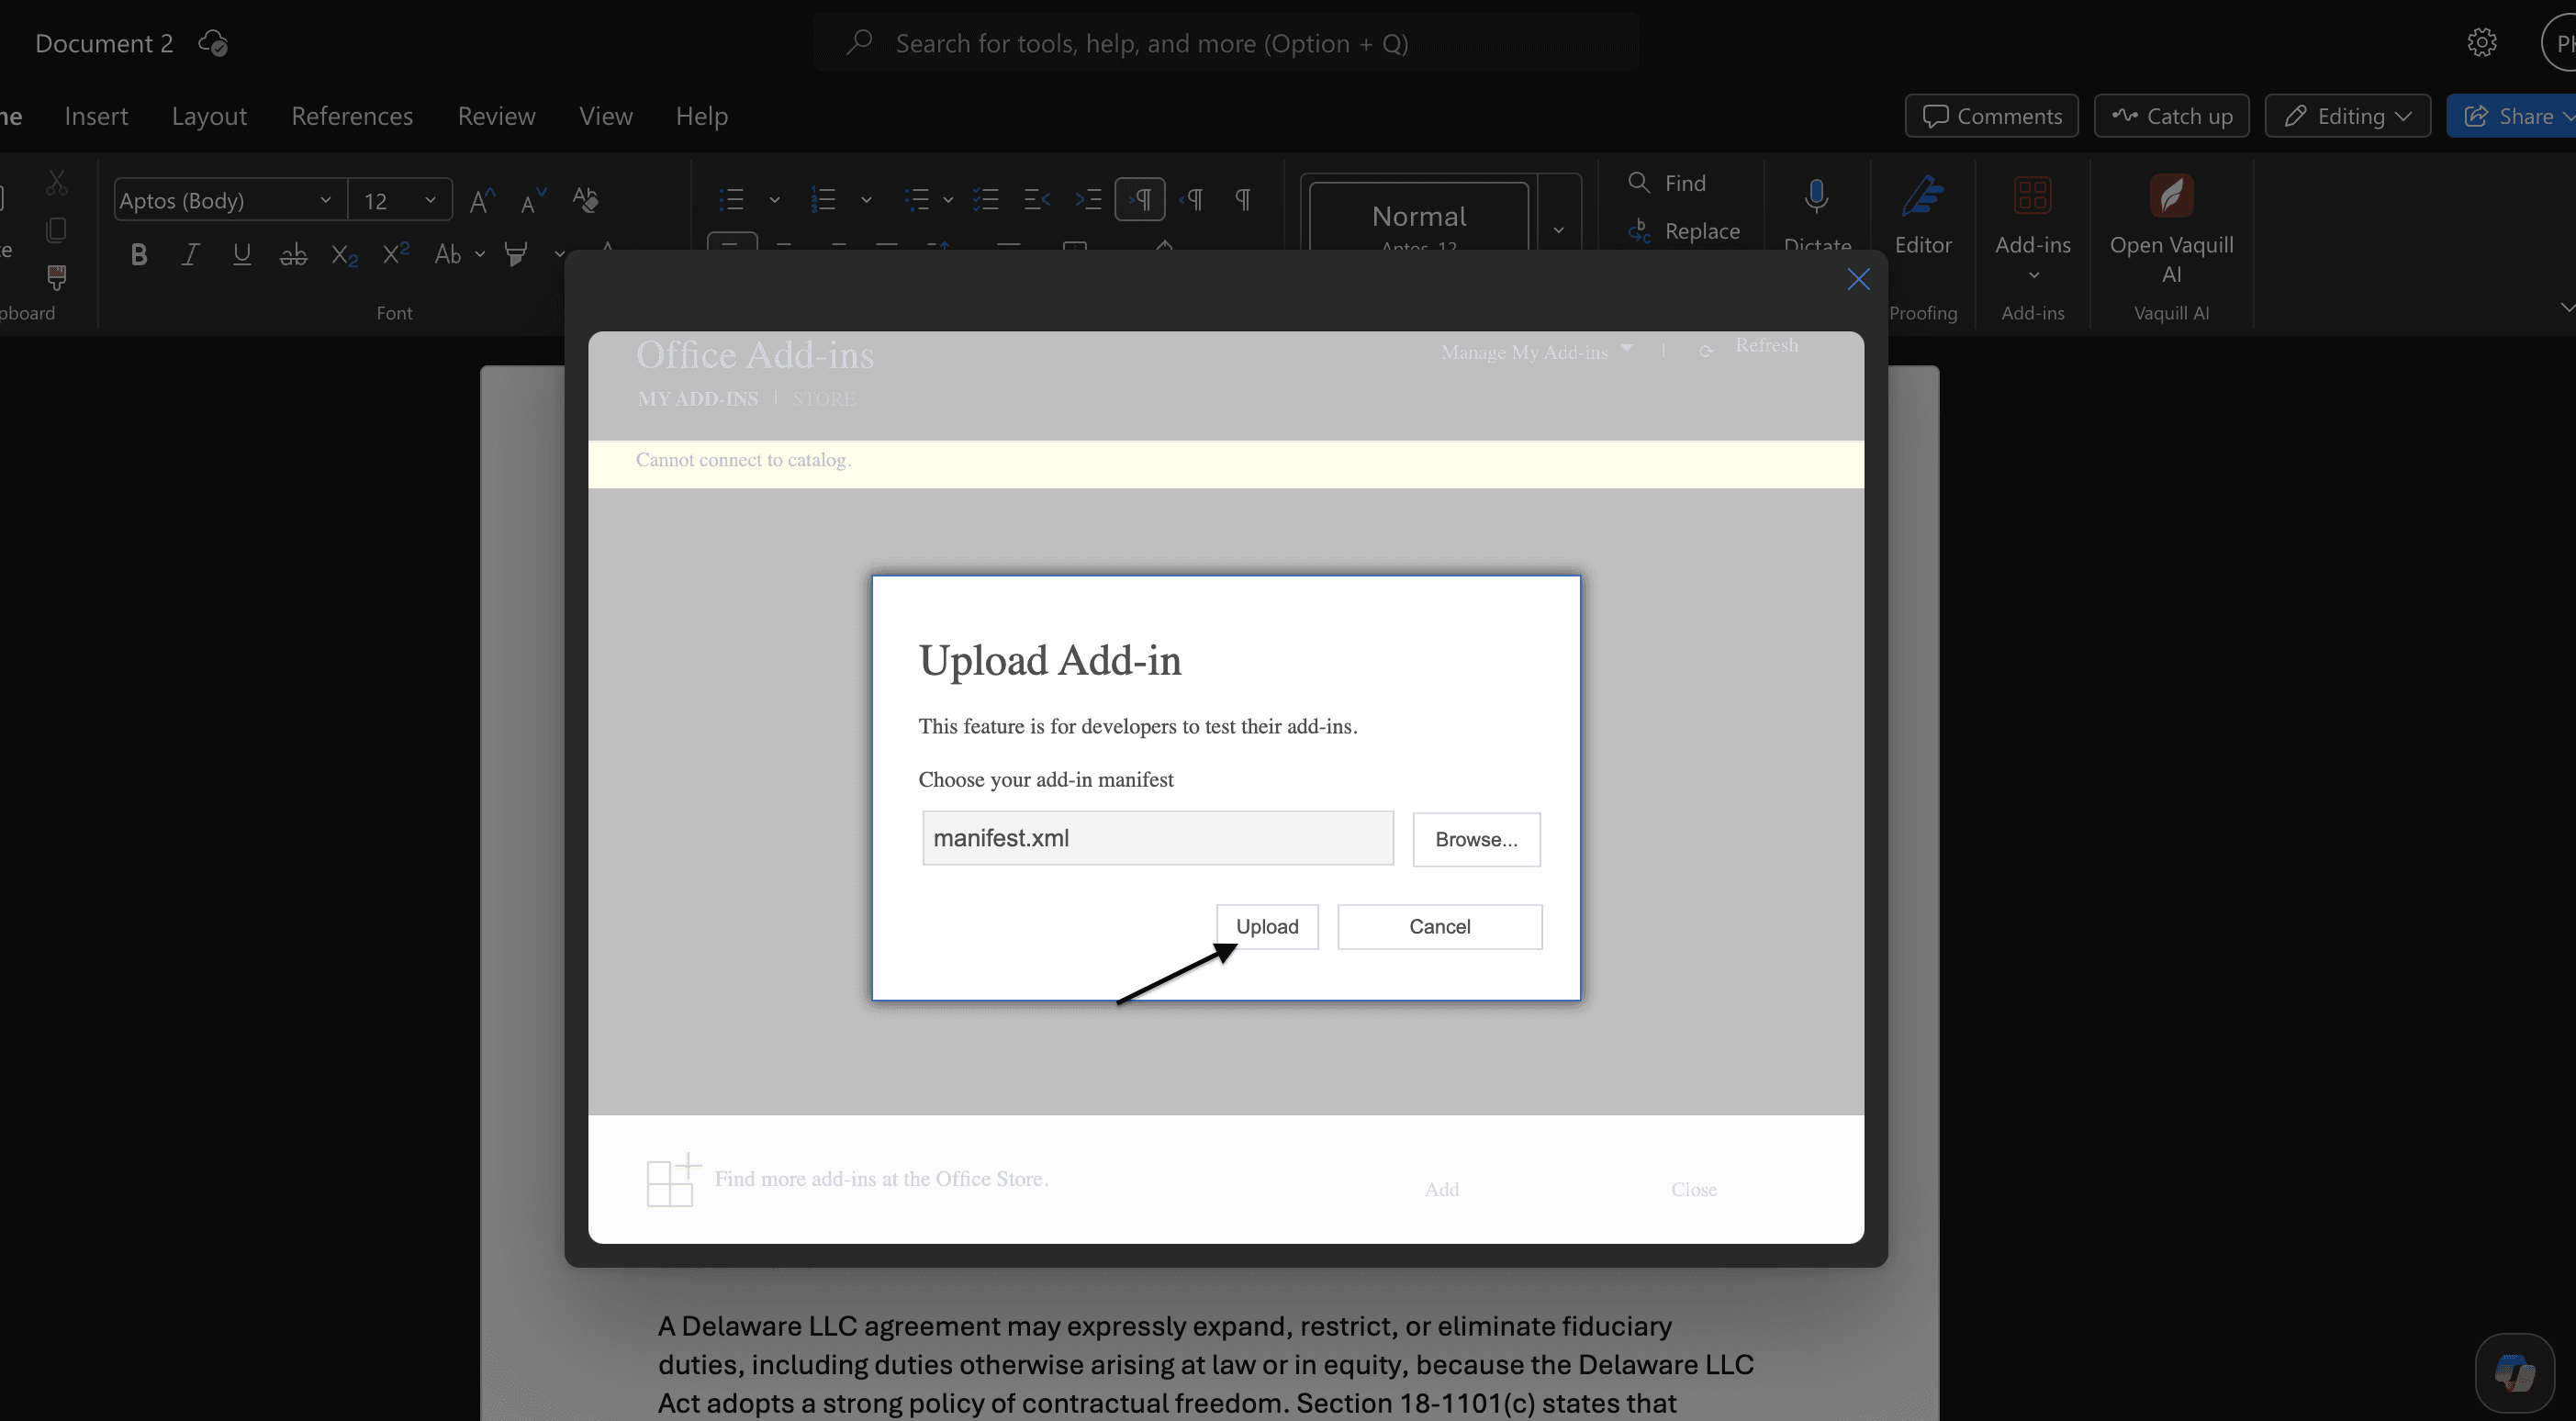
Click Upload
The filename now shows in the box. Click Upload. That is the whole install. Word adds Vaquill AI to your ribbon in a second or two.
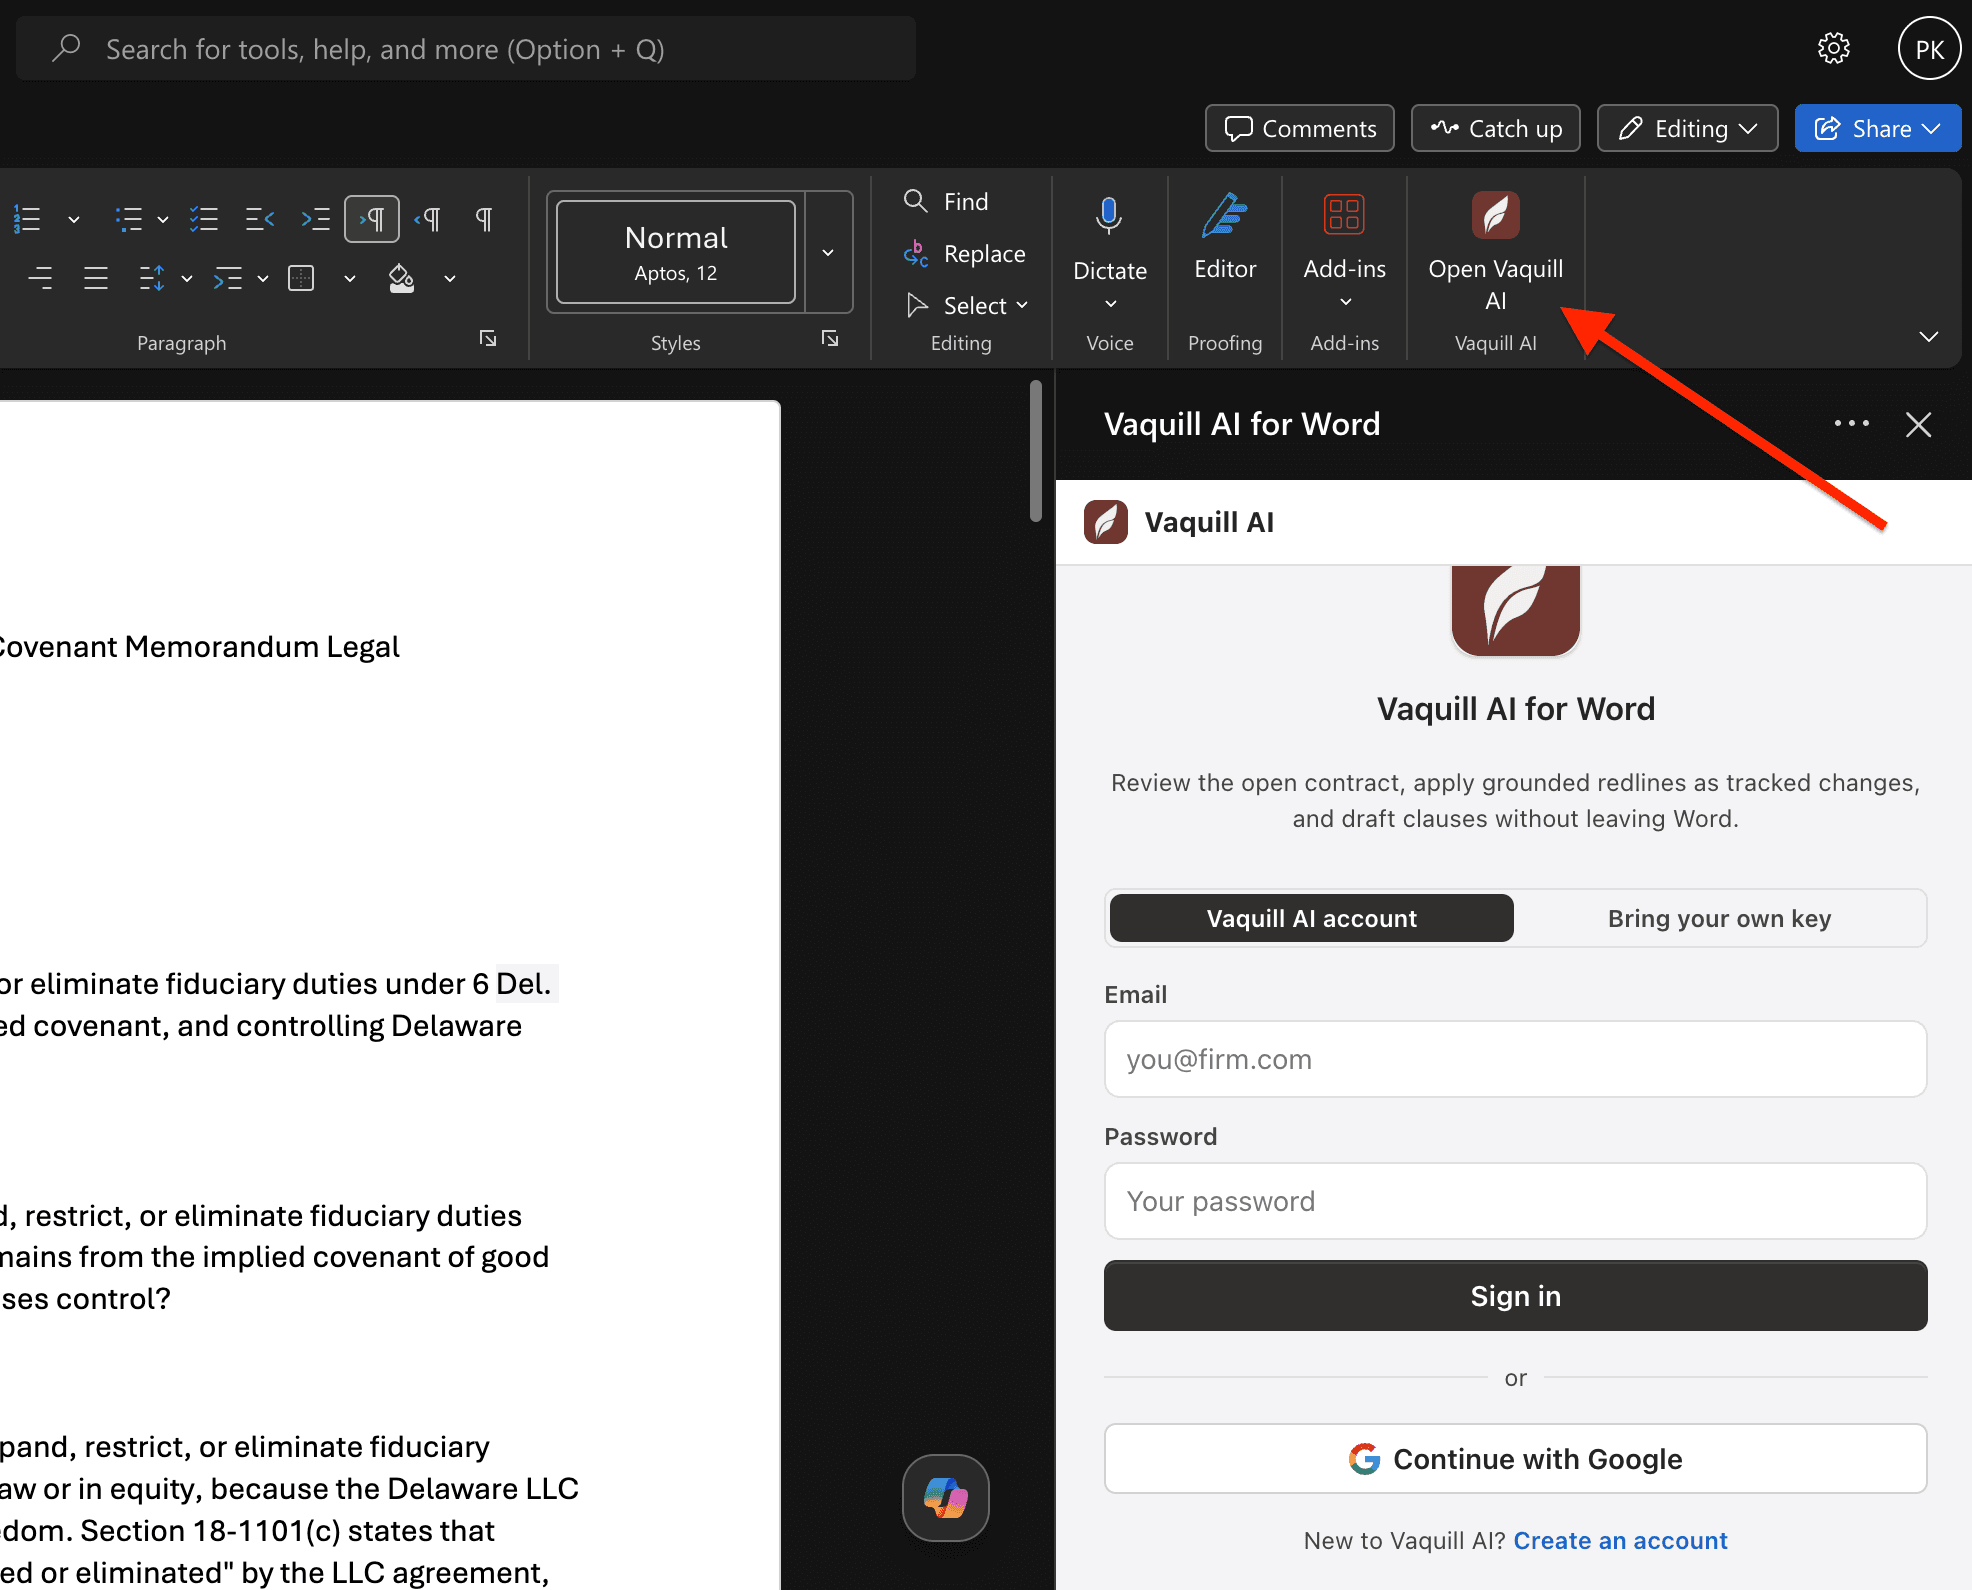
Open Vaquill AI and sign in
A new Open Vaquill AI button appears at the right end of the Home tab. Click it to open the task pane, then sign in with your Vaquill AI account (or Continue with Google). No account yet? Create one free.
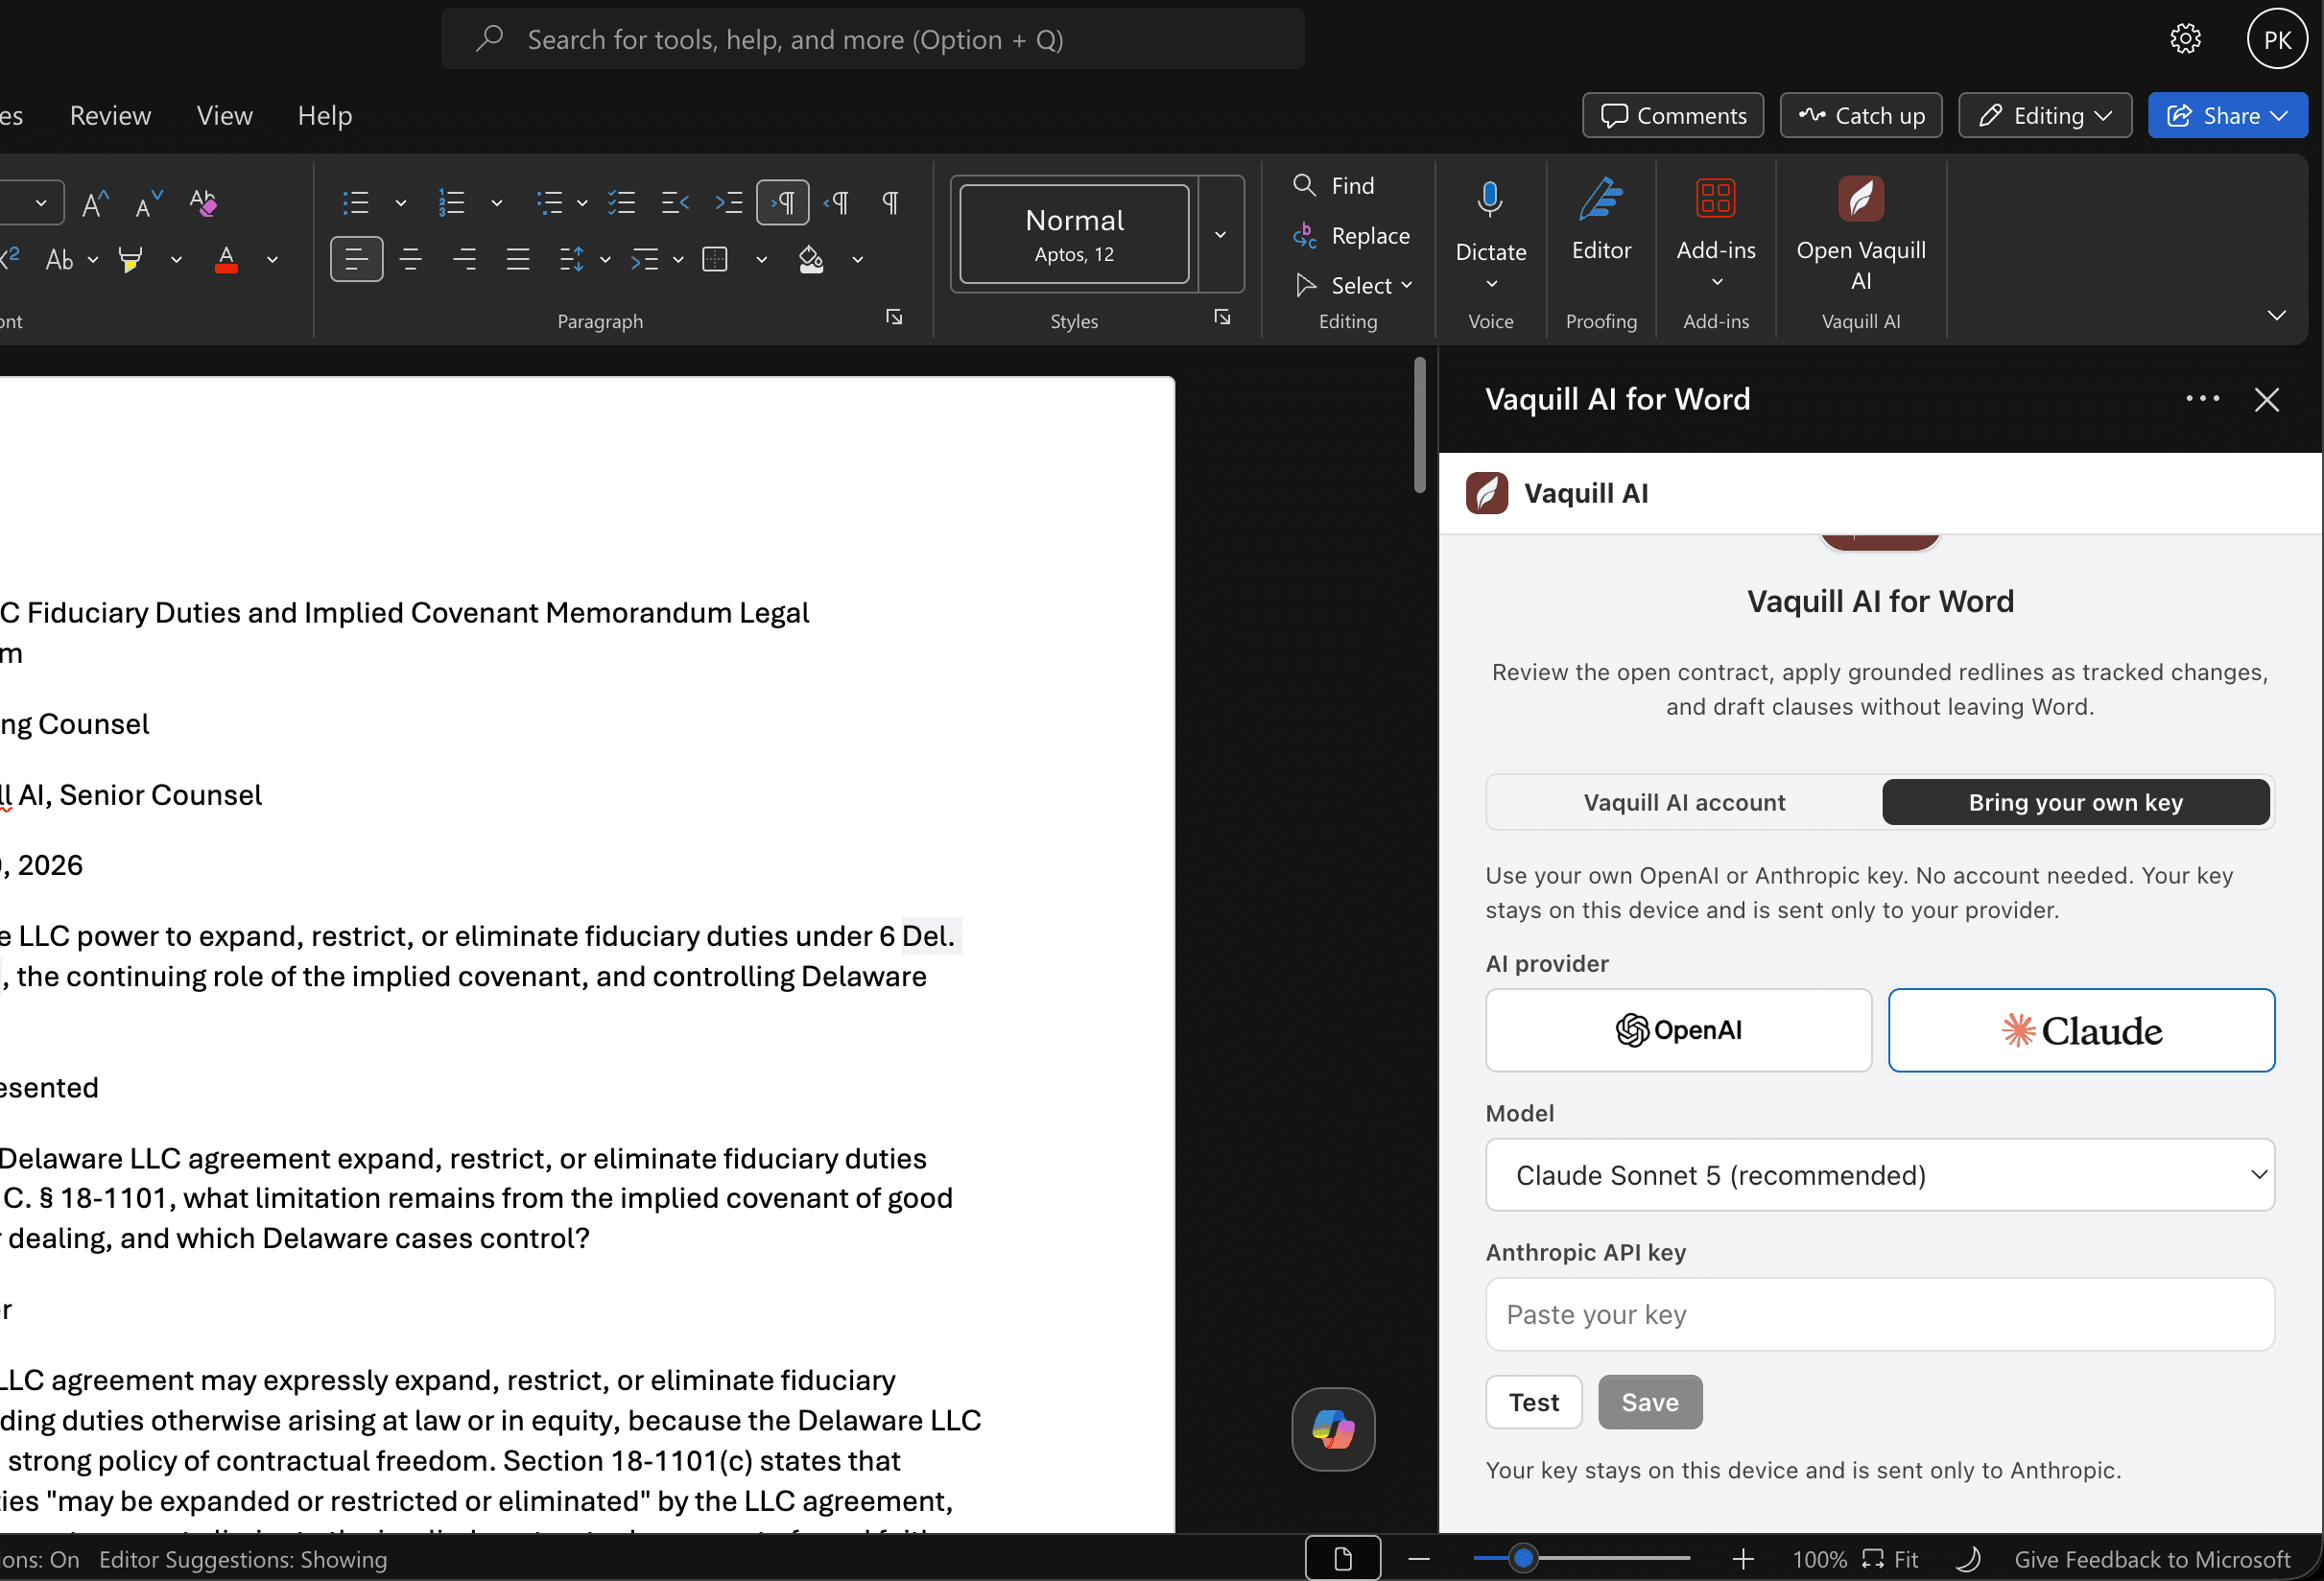
Or bring your own key
Prefer not to create an account? Switch to the Bring your own key tab, choose or , paste your API key, and click Test, then Save. Your key stays on your device and is sent only to that provider. This runs the free community edition.
 On Word for Windows?
The desktop Windows version installs add-ins from a shared folder rather than a direct upload, so the steps differ. The simplest path on Windows is to open your document in Word on the web and follow this guide there. Need the shared-folder method? Ask support.
Not seeing the button?
Refresh the document (or close and reopen it), then look at the right end of the Home tab for Open Vaquill AI. If the upload was rejected, make sure you picked manifest.xml and that its name still ends in .xml. Still stuck? Contact support.
Vaquill AI is a US legal data infrastructure product, not a law firm, and does not provide legal advice. Outputs are AI-generated, may contain errors, and must be independently verified by a licensed lawyer before use in any legal matter. See our Terms of Service and Privacy Policy.
That's it, you're in
Vaquill AI now lives in your Word ribbon. Open the task pane to look up US statutes and regulations with checkable citations, without leaving the document.