To redline a contract in Microsoft Word, go to the Review tab, turn on Track Changes, then edit the document. Every insertion and deletion gets recorded and attributed to you. Save the file as a .docx and send it back so the other side can accept or reject each change one at a time.
That answers the search. The harder part is everything around the buttons. The real skill is producing a clean redline against the counterparty's exact draft, then shipping it without leaking comments, prior edits, or author metadata. This post covers the full loop.
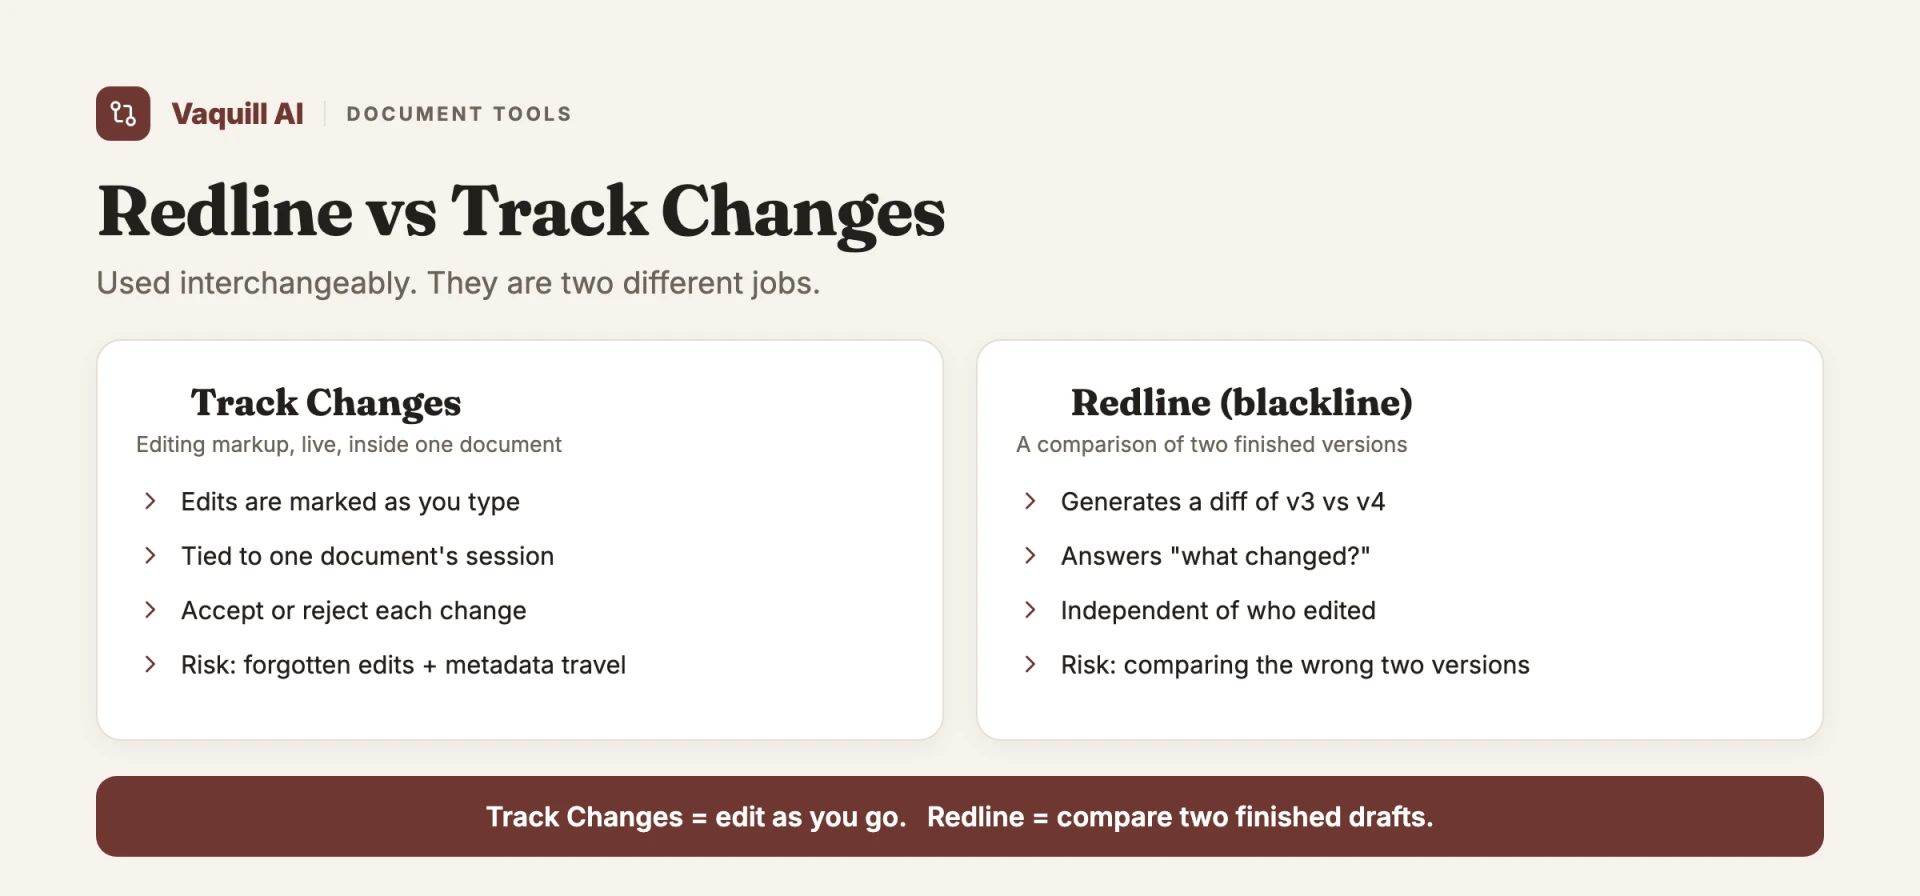
Word's tracked changes are the legal redline standard. When a lawyer says "send me your redline," they mean a tracked-changes .docx, not a marked-up PDF or a colored Google Doc. If you want the vocabulary sorted first, read redline vs track changes.
TL;DR
- Track Changes lives on the Review tab. Turn it on before you type a single edit. Forgetting this is the most common mistake, and there is no clean way to recover the edits you made with it off.
- Compare is how you redline the other side's draft. Review then Compare takes their version and yours and produces a third document with every difference shown as a tracked change.
- Combine merges edits from several reviewers. Stack multiple returned copies into one file when more than one person marks up the same draft.
- Accept and reject happen in the Changes group. Work through edits one at a time, or accept all at once when you trust the source.
- Toggling Track Changes off hides nothing. Comments, prior revisions, and your name stay in the file until you run Document Inspector.
- Clean the metadata before every external send. File then Info then Check for Issues then Inspect Document strips comments, tracked changes, and personal information.
- The decision rule: edit with Track Changes on, compare against the file you actually sent, accept or reject deliberately, inspect, then ship the .docx.
Which Word tool catches edits the other side made with Track Changes off?
This is the Word-specific how-to. For other formats, see how to redline a PDF and how to redline in Google Docs.
Step 1: Turn on Track Changes
Open the contract in Word. Go to the Review tab on the ribbon. In the Tracking group, select Track Changes. The fastest toggle is the keyboard: Ctrl + Shift + E on Windows, Cmd + Shift + E on Mac. The same shortcut turns it back off.
On recent Windows builds the button gives you a small menu: For Everyone tracks every author's edits, and Just Mine tracks only yours. Pick For Everyone for a normal negotiation, so any later edits from the counterparty also get caught. To turn it off, open the same menu and choose Off.
Before your first edit, confirm Word has your name. Go to File, then Options, then General, and check the user name under Personalize your copy of Microsoft Office. If it still reads Author or a shared machine name, every change you make gets attributed to that instead of you, which muddies the redline the other side reads.
The button is a toggle. When it is on, the icon stays highlighted. Make a habit of glancing at it before you start, because nothing on the page tells you tracking is off until you have already typed unrecorded edits.
The shortcuts worth keeping under your fingers:
| Action | Windows | Mac |
|---|---|---|
| Toggle Track Changes | Ctrl + Shift + E | Cmd + Shift + E |
| Update all fields (fix cross-references) | Ctrl + A, then F9 | Cmd + A, then F9 |
| Find a term | Ctrl + F | Cmd + F |
Step 2: Make your edits
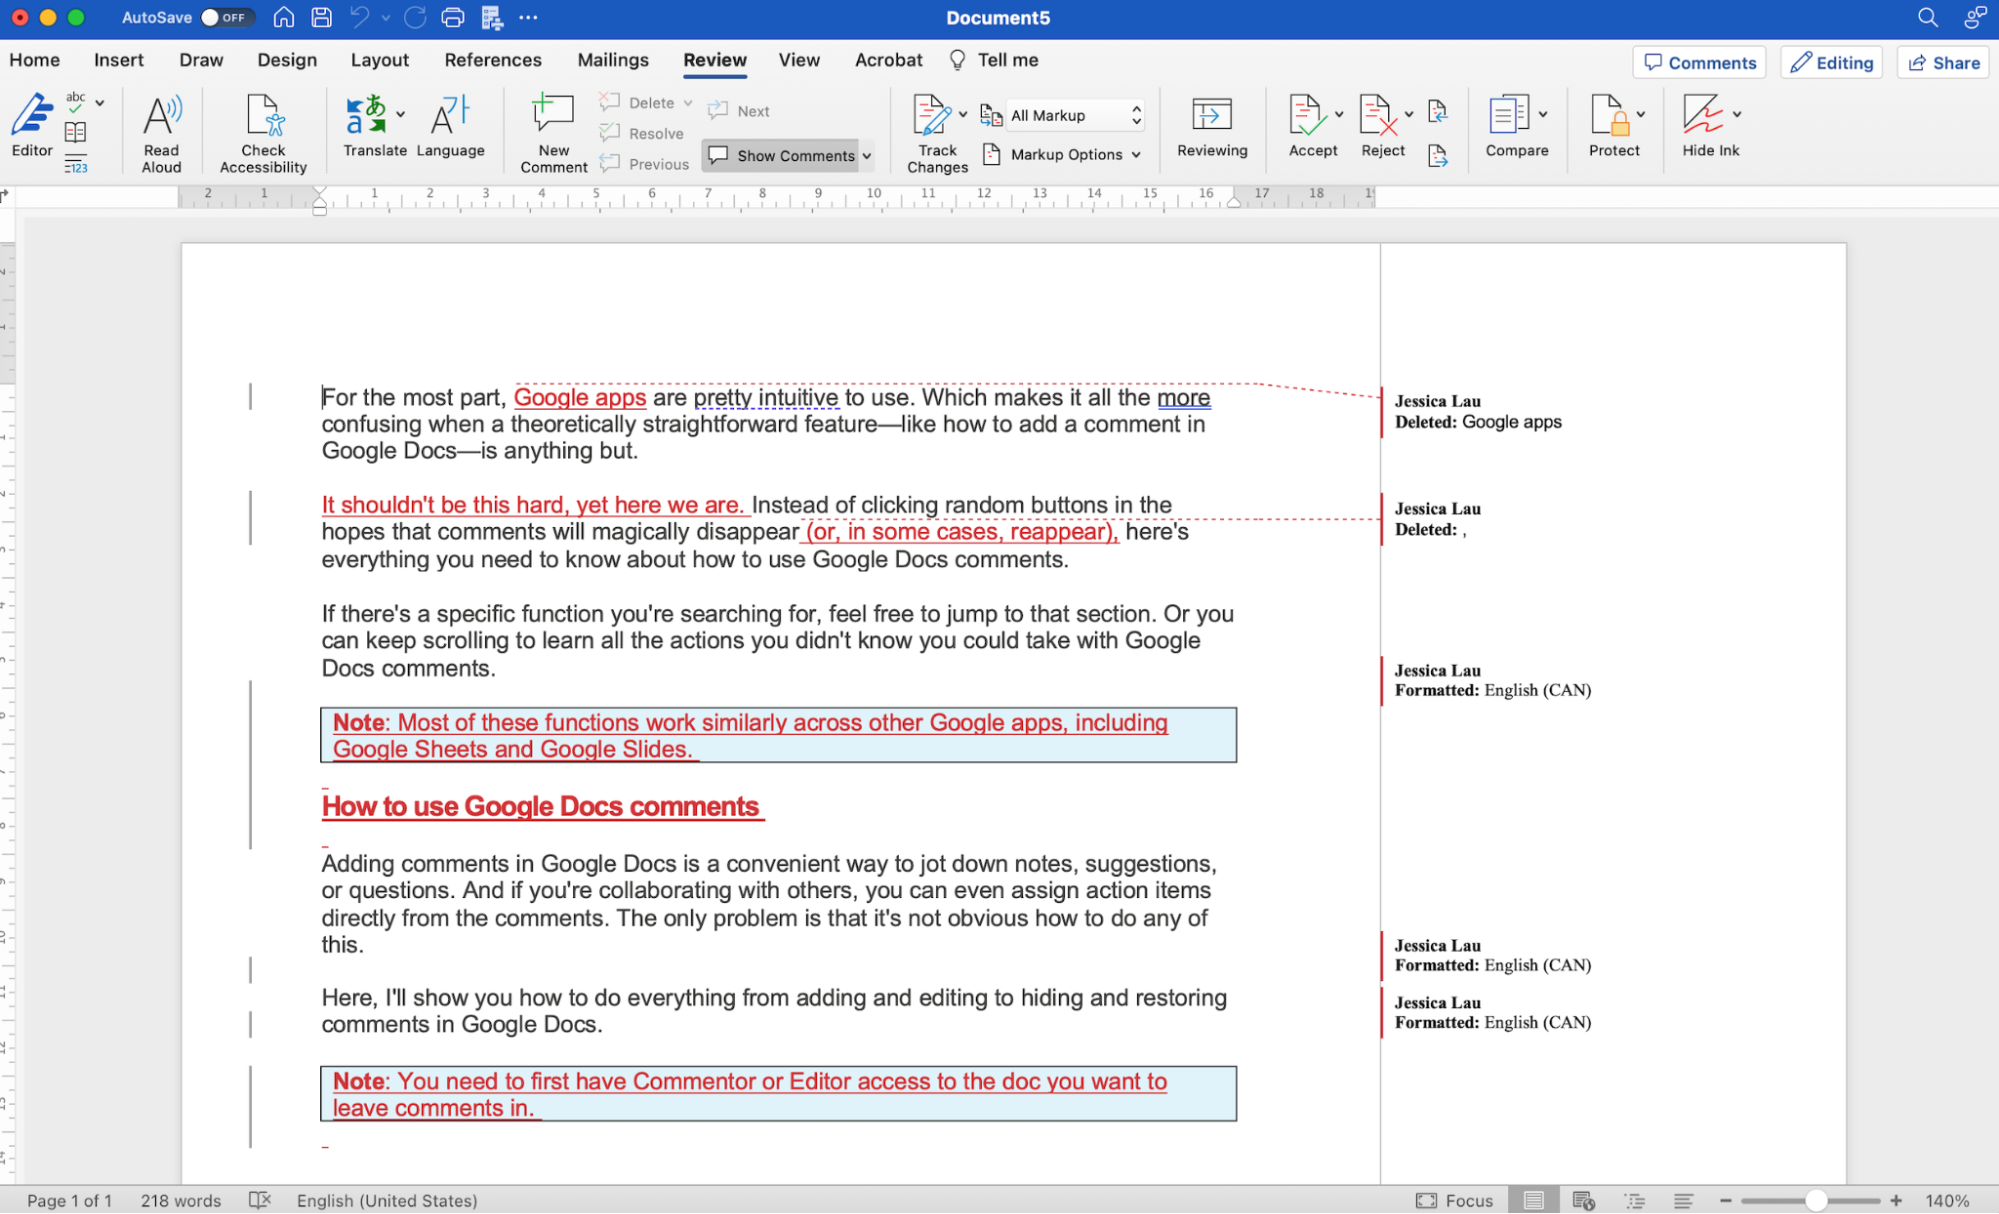
With tracking on, edit normally. Rewrite a clause, delete language, add a provision. Word shows each change as a colored insertion or strikethrough deletion, with a line in the margin marking the row.
To control how much markup you see, use the Display for Review dropdown in the Tracking group. All Markup shows every edit inline. Simple Markup collapses them to margin lines for easier reading. No Markup previews the document as if every change were accepted, and Original shows it as if every change were rejected. Switching views changes only your screen, not the file.
Each change carries your name and a timestamp. Hover over an edit to see who made it and when. That attribution is the whole point of a redline: everyone can see exactly who proposed what.
Word assigns each author a color automatically, but you cannot pin a color to a person across machines, so do not rely on color alone to tell reviewers apart. To read one person's edits in isolation, open Show Markup in the Tracking group, choose Specific People, and untick everyone except the reviewer you want.
Step 3: Add comments where an edit alone is not enough
Some changes need a reason. To leave a note, select the text, go to the Review tab, and choose New Comment in the Comments group. Type your rationale, like why you cut an indemnity carve-out or what number you need on a liability cap.
Use comments for questions and explanations, not for edits you can make directly. "Can we get to net 45?" is a good comment. Rewriting the payment-terms sentence should be a tracked edit, not a comment asking them to do it. Comments are also the first thing that leaks if you skip the cleanup step, so keep them professional.
Step 4: Compare two versions to generate the redline
Here is the part most how-tos skip, and it is the one that matters. When the counterparty sends back a clean copy with no tracked changes, or you suspect their "redline" hides edits, do not eyeball it. Run a comparison.
On the Review tab, in the Compare group, select Compare, then Compare two versions of a document (legal blackline). A dialog opens. Under Original document, pick the version you sent. Under Revised document, pick the version they returned. Click More to set whether changes show at the word level or the character level, and to choose what to compare, like text, formatting, headers and footers, and comments. Click OK.
Word builds a third document showing every difference as a tracked change, without altering either source file. The result is a true redline of what actually changed between the two drafts.
For the deeper mechanics of getting a trustworthy diff, including how to avoid formatting noise, see how to compare documents and export clean redlines.
Step 5: Combine redlines from multiple reviewers
Compare handles two versions. When three people mark up the same draft and each sends a separate file, you need Combine, which merges several authors' tracked changes into one document.
On the Review tab, in the Compare group, select Compare, then Combine. Pick your base file under Original document and the first reviewer's copy under Revised document, then click OK. Word folds their edits into a single file, each author still attributed and color-coded. Run it again against that combined file for the next reviewer, and repeat until everyone's edits sit in one document you can resolve in a single pass.
The difference between the two tools is worth holding onto. Combine keeps tracked changes as tracked changes, so reach for it when reviewers used Track Changes correctly and you want to stack their edits. Compare converts differences into tracked changes, so reach for it when you need to catch what someone changed without tracking.
Step 6: Accept or reject changes
Once you have a redline to resolve, work through it. On the Review tab, in the Changes group, use Accept and Reject.
Go change by change with Accept and Move to Next or Reject and Move to Next so you read each one before deciding. When you trust the whole set, the dropdown gives you Accept All Changes or Reject All Changes. You can also right-click any single change for the same options.
Resist accept-all on a counterparty's draft. The point of a redline is that you read every edit. One quiet change to a definition or a cross-reference can shift the meaning of clauses pages away.
Step 7: Clear formatting noise and broken numbering
A common frustration: you run Compare and the redline is buried under hundreds of trivial marks. A different font, a changed margin, an auto-renumbered list, and suddenly every line looks edited.
Two fixes. In the Compare dialog, under what to compare, turn off Formatting so the redline shows only text changes. Or in the result document, open the Display for Review dropdown and Show Markup, then untick Formatting to hide format marks while you read the substance. Clean the visual noise so the real edits stand out.
Broken numbering is the other cleanup. Pasting a counterparty's clause or accepting a block of their edits often breaks automatic numbering, so Section 4.2 suddenly reads as Section 2, or a cross-reference points at the wrong clause. Two habits keep this clean. Build lists off Word's multilevel list styles rather than typed-in numbers, so sections renumber themselves when clauses move. And insert cross-references as fields (References, then Cross-reference) rather than typing "Section 7.1," so they update instead of going stale. To refresh every field at once after a heavy edit, select all with Ctrl + A and press F9. Do a final pass on numbering before you send, because a redline with the wrong section numbers reads as sloppy and invites a nitpick fight.
Step 8: Clean the metadata before you send
Turning Track Changes off does not remove anything. Accepting changes does not remove comments. The file still carries tracked-change history, comments, your name, and other hidden data until you scrub it. Send it as-is and you may hand the other side your internal notes or earlier positions.
Run Word's Document Inspector. Go to File, then Info, then Check for Issues, then Inspect Document. Word scans for comments and revisions, document properties and personal information, headers and footers, hidden text, and other buried content. Review each category and remove what should not leave your building.
Microsoft warns to run the inspector on a copy, because removed data cannot always be restored. So save a working copy with your full history, inspect and clean the version you are sending, and keep the two separate.
Step 9: Lock tracking when you need it enforced
If you are sending a draft to someone who tends to edit with tracking off, you can force it on. On the Review tab, open the Track Changes menu and choose Lock Tracking, then set a password. Now no one can turn tracking off or accept and reject changes without that password.
This is useful for junior reviewers, outside parties you do not fully trust to follow the redline convention, or any workflow where every edit must stay visible. Unlock it the same way, by entering the password. On Word for Mac the equivalent lives under Protect then Protect Document.
The verdict
Redlining in Word is not about the buttons. The buttons are easy. The skill is discipline around them.
Turn on Track Changes before you touch the text. Compare every returned draft against the exact file you sent, so nothing edited in the dark slips past. Read each change before you accept it. And run Document Inspector before every external send, because a clean-looking file can still carry comments, history, and your name. Do those four things and your redlines stay accurate and stay yours.
If you would rather not run Compare and Inspect by hand on every contract, Vaquill AI ingests a draft, surfaces what changed against your prior version or a standard, and writes the redline back into native Word track changes, so what you send stays negotiable and clean. You can also browse plain-English explanations in our clause library while you review.
FAQ
How do I turn on Track Changes in Word? Go to the Review tab and select Track Changes in the Tracking group, or press Ctrl + Shift + E on Windows or Cmd + Shift + E on Mac. On recent Windows builds you can pick For Everyone to track all authors or Just Mine for only your edits. The button is a toggle, so confirm it is highlighted before you start editing, since Word records nothing while it is off.
What is the difference between a redline and track changes? In practice they are the same thing for contracts. A redline is the marked-up document; track changes is the Word feature that produces it. Lawyers use the words interchangeably. We break the distinction down in redline vs track changes.
How do I compare two versions of a contract in Word? On the Review tab, select Compare, then Compare two versions of a document (legal blackline). Choose your sent version as the Original document and their returned version as the Revised document. Word creates a new third document showing every difference as a tracked change, without altering either source file.
How do I combine redlines from several reviewers? On the Review tab, select Compare, then Combine. Choose your base file as the Original document and one reviewer's copy as the Revised document. Word merges their tracked changes into a single file with each author still attributed. Repeat against the combined file for each additional reviewer until every edit sits in one document.
Why is my redline cluttered with formatting changes? Compare flags formatting differences like fonts, margins, and renumbered lists alongside real edits. In the Compare dialog, untick Formatting under what to compare so only text changes show. You can also hide format marks afterward through Show Markup in the Display for Review options.
Do I need to remove metadata before sending a contract? Yes. Turning off Track Changes and accepting edits does not remove comments, revision history, or author data. Run File then Info then Check for Issues then Inspect Document to strip hidden information. Do it on a copy, because Microsoft warns that removed data cannot always be restored.
How do I print a contract with the redlines showing? Go to File then Print. Under Settings, open the Print All Pages dropdown and confirm Print Markup is ticked. Word then prints insertions, deletions, and comments as they appear on screen. Untick Print Markup to print a clean copy with every change shown as accepted.
How do I stop someone from turning off Track Changes? Open the Track Changes menu on the Review tab and choose Lock Tracking, then set a password. Tracking then stays on, and no one can accept or reject changes, until the password is entered to unlock it. On Word for Mac the same control sits under Protect then Protect Document.
Should I accept all changes at once? Only when you trust the whole set, like your own clean draft before sending. On a counterparty's redline, work change by change with Accept and Move to Next so you read each edit. A single quiet change to a definition or cross-reference can shift the meaning of clauses elsewhere.
Can I redline a contract that arrived as a PDF? Not inside the PDF. Convert it to a .docx first, then use Track Changes as above. Marking up a PDF only layers comments on top, which the other side cannot accept or reject. See how to redline a PDF for the conversion steps.
Sources
- Track changes in Word (Microsoft Support)
- Compare document differences using the legal blackline option (Microsoft Support)
- Remove hidden data and personal information by inspecting documents (Microsoft Support)
For software that handles the whole loop, see the best legal redline software. To redline with AI inside Word itself, see legal AI in Microsoft Word and the comparison of Word add-ins.
Last updated: July 2026.
New legal AI guides, weekly.
Further Reading
How to Redline a PDF Contract
Read postHow to Redline a Contract in Google Docs
Read postContract Renewal Tracking: How to Never Miss a Deadline
Read postContract Turnaround Time: How to Measure and Cut It
Read postHow to Draft a Contract: A Step-by-Step Guide
Read postMicrosoft Copilot for Lawyers: What It Can and Cannot Do
Read post
Co-Founder & CEO · Attorney
Arshita leads product and strategy at Vaquill AI, the US primary law data API. As an attorney, she decides which law we carry, how each section is sourced and cited, and what legal AI and compliance teams need from the data.